
Well this is it! 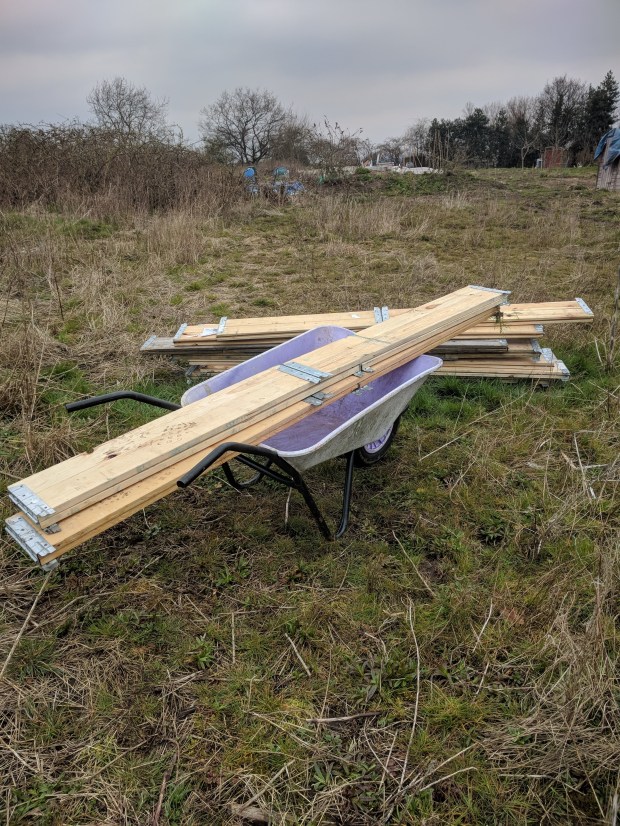
My new plot – a weed-ridden boggy site covered in weeds. What was I thinking? Well, I’m told it will eventually dry out and as I’m going to practice no-dig gardening in raised beds I’m telling myself I don’t need to worry too much about the weeds.
I’m trying to keep my costs down as much as possible and so looking for free or cheap materials. Having spent a long time researching the various ways of constructing raised beds I came across the idea of using pallet collars. I’d not come across them before but they are designed to be used as additional protection for goods transported on pallets. The UK standard size is 1200 x 1000mm and 195mm deep (approx 4ft x 3ft 3in x 8 in deep) They are hinged at each corner so they can be stored or transported flat as shown in the photo, and the metal hinges protrude on one side and this enables them to be stacked on each other when opened out; so you could put them together to make deeper beds.
I was lucky enough to find someone locally offering pallet collars at £5 each on Gumtree. In fact my neighbour was also interested in them to replace her old raised beds built with scaffold boards some years ago, so I placed an order for 30 (18 for me and 12 for her) and cheekily asked for a discount – so got the 30 for £130 including delivery making them £4.33 each. I also found some on ebay listed at £4 each but they were further away in Dudley and delivery was quoted as £55.
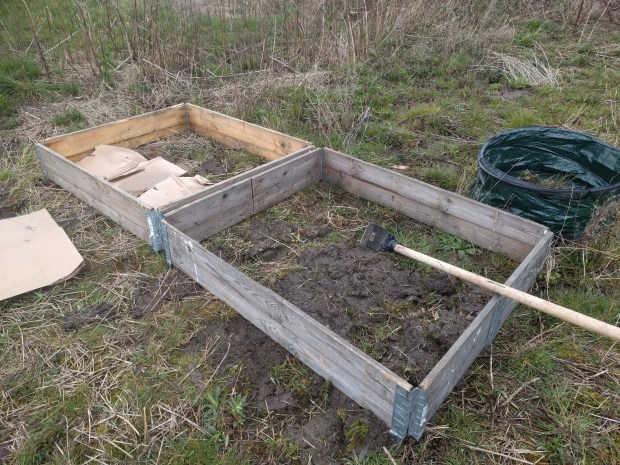
So here are the first two in situ. I’m pushing two together to make an 8ft bed and then will leave a path about 2ft wide before placing the next 8 ft bed. This will be the central path up through the plot and allow space for getting a wheelbarrow through. On the long sides I’ll leave about 1ft or maybe 18 inches just to allow space for my feet and access to either sides of the beds.
Although I wasn’t intending to do any digging I did do a bit to even out the level of the ground underneath. This section of my plot appears to have some earlier raised beds although there’s no evidence of any wooden sides but there are definite peaks and troughs. So I did slice off the tops of the peaks and turned the clods over into the troughs. I did this using my new toy – a Chillington digging hoe (sometimes known as an azada) – you can see it in the picture. This worked perfectly for this job and with no strain on my back – so very happy with it so far. The advantage of doing even this bit of digging was that it allowed me to have a bit of a closer look at the soil. And I was encouraged by how soft it appeared to be despite being very wet still – and also by the number of worms I saw. Although I will be adding compost & manure and planting in the raised beds I expect that roots of plants will also be reaching down into the soil below the beds too. And I may also be digging a little bit of soil out from in between the beds to lower the paths slightly (I’ll be adding bark chippings eventually) and this will be mixed with compost in the beds.
As I lay each pallet collar in place I will immediately layer damp cardboard at the bottom to cut out the light. This will immediately start working as a weed suppressant whilst I await delivery of manure etc hopefully be next weekend.
My current plan is to cover about a third of the allotment with raised beds, leave a third for shed, compost bin and some plants not going into raised beds and cover the remaining third with black polythene to suppress the weeds. A request on freecycle for black polythene yielded a result and this is now also in situ. I had a bit of help from my son Aidan in getting it there and laying it out.


So a daunting task but I’ve got a plan, have made a start and hope that by working steadily one step at a time I’ll make progress and it won’t be too long before I can actually get some plants and seeds in the ground.
